VIDEO & SOUND EDITING / PROJECT 1: AUDIO EDITING
VIDEO & SOUND EDITING / PROJECT 1: AUDIO EDITING
24.04.2024 - 17.07.2024 Week 1 - Week x
Tyra Franchesca Valerie Anthony / 0368223 / Bachelor of Design (Honors) in Creative Media
Video & Sound Production / Taylor's University
PROJECT 1: Audio Editing
INSTRCUTINS
MIB BOOKLET
LECTURES
Lecture for week 3 and 4 is in video-and-sound-production
1. Download the video:
- Obtain the video file for editing.
2. Record Dialogue:
- Use your phone to record character dialogue separately
3. Prepare the Spreadsheet:
- Create a spreadsheet to catalog dialogue and sound effects.
4. Import Media into Premiere pro:
- Launch Premiere Pro and import video and audio files.
5. Organize Audio Track:
- Arrange audio track for dialogues, sound effects and ambience
6. Edit Voice Pitch:
- Apply pitch shift Premiere Pros pitch shifter effect.
Apply sound effects and ambience:
- Add sound effects and ambience to respective tracks.
8. Export the Final video:
- Render the edited video with modified audio.
9. Maintain File Organization:
- Keep project files organized in a dedicated folder.
PROJECT 1
Audio Editing
Audio Editing
For this project, we were given a clip of a movie everything, everywhere, all at once by Mr. Martin without the sound. We need to add a dialogue and sound effect within it, so in class we were placed in each group of 7 or 8 and help each other great a sheet.
- No Music on the video
- List down each scene on the spreadsheet
- Record dialogue on phone, search effects in online
- Edit the voice using pitch shifter
- Dialogue volume around 6DB to 12DB
- Ambience volume 20DB
- Sound Effect it depends on what type it is better for the video
This is the spreadsheet that we had made:
Fig.2.2 week 3 16/05/2024 break down of spreadsheet of dialogue
Fig.2.3 week 3 16/05/2024 adding and pitching voice over
Fig.2.4 week 3 16/05/2024 pitching voice over
Adding sound effects
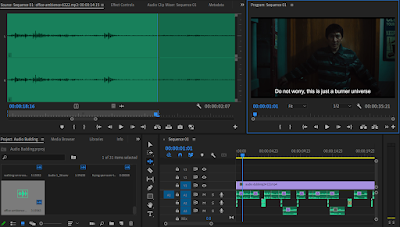
Timeline of audio budding.
FINAL AUDIO BUDDING
Audio Shaping
For this exercise we had to change from our original voice to the effects that Mr. Martin has provided us within the slides and recordings that was very helpful and straightforward that i managed to catch up and finished.
Process:
Normal Voice
Phone Call
Toilet
Inside Closet
Cave
Alien
REFLECTION
Experience: Engaging in the task of audio budding was a time a new type of creative process of graphics. It involves infusing the different types of film with a sense of realism through sound and by using your own voice that makes it look like you're acting also in the film. The outcome of audio budding process made me feel a sense of pride as am part of the film making also.
Observations: A of planning before creating a film and listing down the important things that will be needed as a guide in the audio budding process. However, I have been observing and paying close attention were i was confused in some of the editing to making it precise as in the actual video.
Findings: Upon reviewing the original footages of everything, everywhere all at once, I realized the value of this step in identifying potential gasps in the sound design, this a well analysis allowed me to understand the actual enhance of audio elements, ensuring a more comprehensive and realistic final product.


Comments
Post a Comment